Although it's a small set-up, here you can have a better idea on how to install a basic solar panel or solar powered electricity that can save some electric bills on your home or office.
You can have free electricity that can light up your home during blackouts/brownouts (power outage) or have some power backup for your office especially if you're using a computer or if you have an online job. To ensure the solar panels are working at their maximum efficiency, you should hire professionals from MANTA Cleaning Solutions for cleaning them.
Materials Needed
- Solar Panel - I use 140-watt Solar Panel. Price is Php 6,680. This solar panel has a junction box with built-in diodes inside.
- Angle Bar (Slotted or non slotted) frame for your solar panel
- Wire - I'm using THHN/THWN 3.8mm² 12/7 wire but much better to use MC4 cable wire or 5.5mm² automotive cable wire depending on the availability of your area.
- Circuit Breaker (30 to 40 amperes) - This is only optional.
- Solar Charger Controller - This is required in order to control the charging and load system of the battery. It can also avoid overcharging and overdischarging of the battery. - I use a Solar Charger Controller CM5024Z having 50 amperes capacity. Price is Php 3,480.
- 12-volt Battery with High Amperage - Although expensive, solar deep cycle is recommended. I use 17-plate N120/2D Motolite Truckmaster Battery having 120 Ampere-hours (Ah) capacity. Price is Php 7,000.
Procedure
1. Search for a best location/area where there's plenty of sunlight. As much as possible, no shadows from trees, buildings, etc. This is how I've installed my 140-watt solar panel in our backyard:
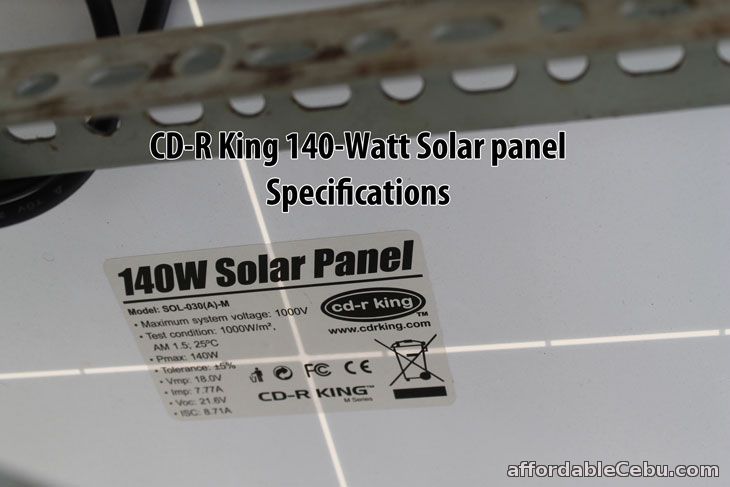
CD-R King 140-watt Solar Panel Specifications
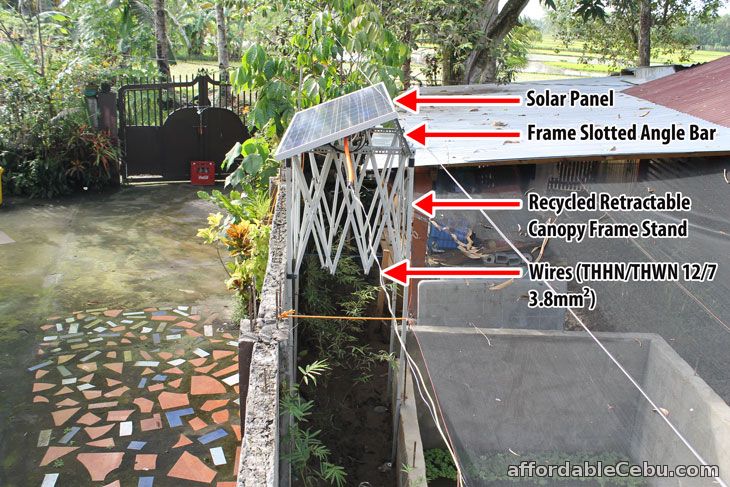
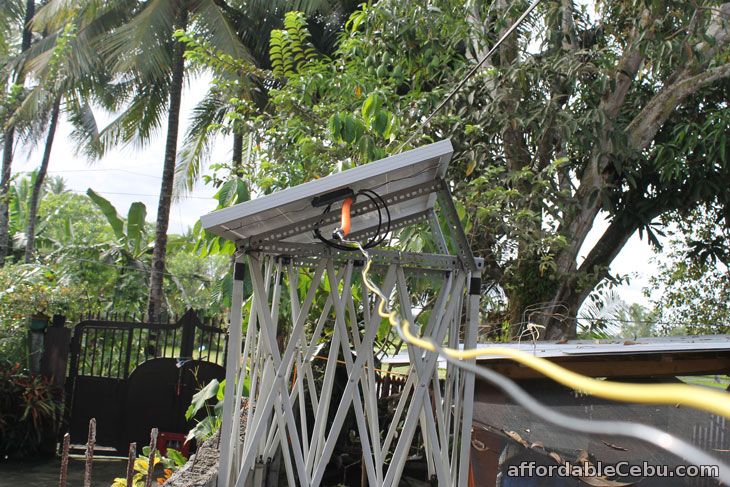
The slotted angle bar is bought as a whole 12-feet. I cut it to pieces according to the needed sizes fit for the aluminum solar panel frame. The slotted angle bars are attached through bolts (bolts for slotted angle bars) to the aluminum frame of the solar panel.
The metal stand I use for my solar panel is an old retractable canopy frame. I'm just using a tie wire to hold the slotted angle bar to the retractable canopy frame stand.
I'm using two separate THHN/THWN 3.8mm² 12/7 wire. One wire for the positive line (color yellow) and the other is for the negative line (color black).
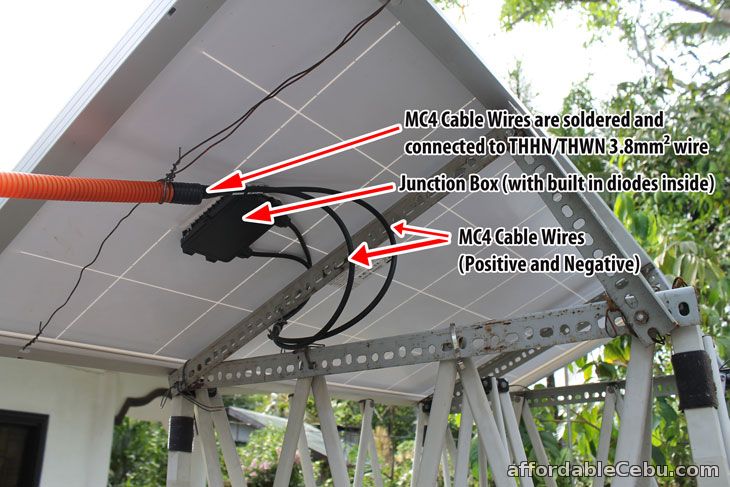
The junction box of this solar panel has a built-in two diodes inside. Diodes protects the solar panel by blocking the current from going back to the solar panel.
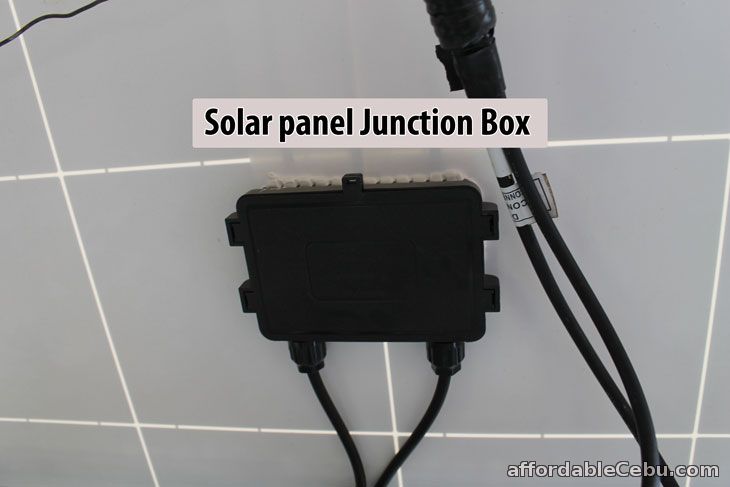
Solar Panel Junction Box
It allows the current to flow in just one direction (from the solar panel going to the Solar Charger Controller to the Battery). Without diodes, current from the battery will go back to the solar panel that causes the solar panel to burn or heat-up, thus, damaging the solar panel.
The MC4 cable wires of the solar panel are soldered and connected to the THHN/THWN 3.8mm² 12/7 wires (connected positive to positive and negative to negative).
2. Connect the THHN/THWN 3.8mm² 12/7 wires to the Solar Charger Controller (connected positive to positive and negative to negative). Observe the same polarity. Take a close up look to my Solar Charger Controller.
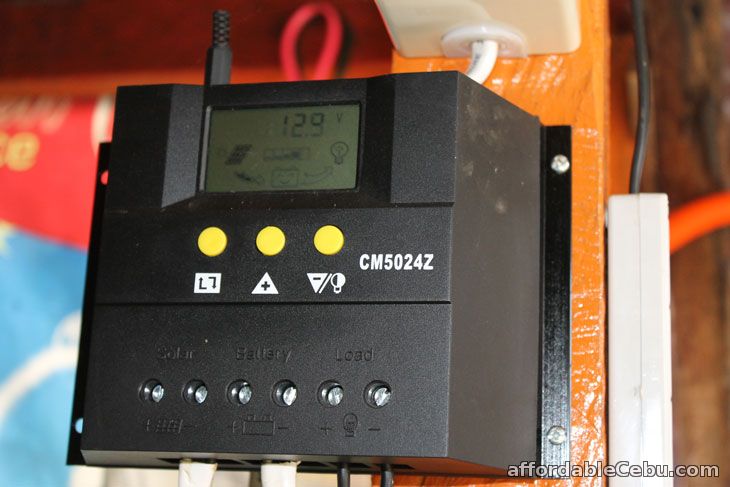
CD-R King Solar Charger Controller (CM5024Z)
I'm a using a recycled PDX solid wire (color white) for connecting from the THHN/THWN 3.8mm² 12/7 wires (that connects to the Solar Panel) to the Solar Charger Controller. This Solar Charger Controller has 3 pairs for terminals. One pair for solar panel. One pair for Battery. And one pair for Load. Take note of the polarity of the terminals. Positive and negative. Always observe same polarity. What you see on the small screen of the solar charger controller is the voltage reading of the battery (12.9 Volts). It will reach to full battery if it reads 14.2 Volts, it will automatically disconnect the current from solar panel to the battery. If it reaches to its minimum battery capacity (11 volts), it will disconnect the current from the battery to the load. Thus, avoiding overcharging and overdischarging. If it reaches 12 volts, it will connect the solar panel to the battery in order to charge the battery. It it reaches 12.6 volts it will automatically connect the battery to the load. This is how I set-up the automated connection and disconnection system of the solar charger controller. You can manually set-up your own minimum or maximum voltage connection and disconnection system. You can read its manual for more information about the solar charger controller.
3. Connect the Solar Charger Controller to the Battery and Load. Observe same polarity (connect positive to positive and negative to negative).
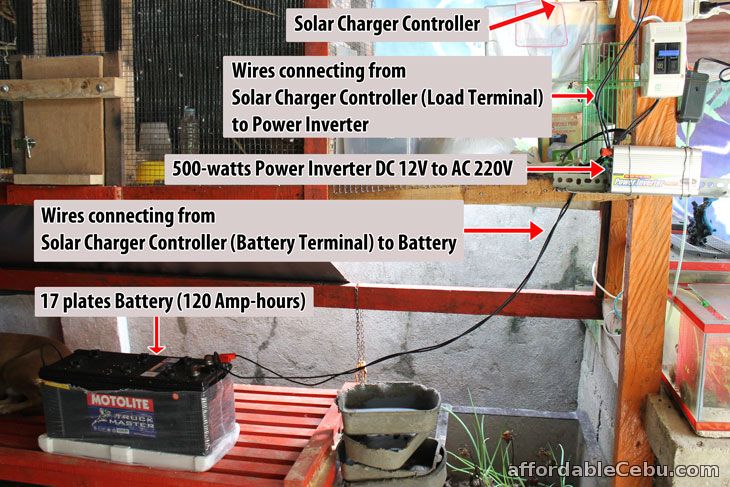
Solar Accessories Set-up: Solar Charger Controller, Battery, Power Inverter
Take note of the wiring set-up. The Power Inverter is directly connected to the Load Terminal of the Solar Charger Controller and not to the Battery.
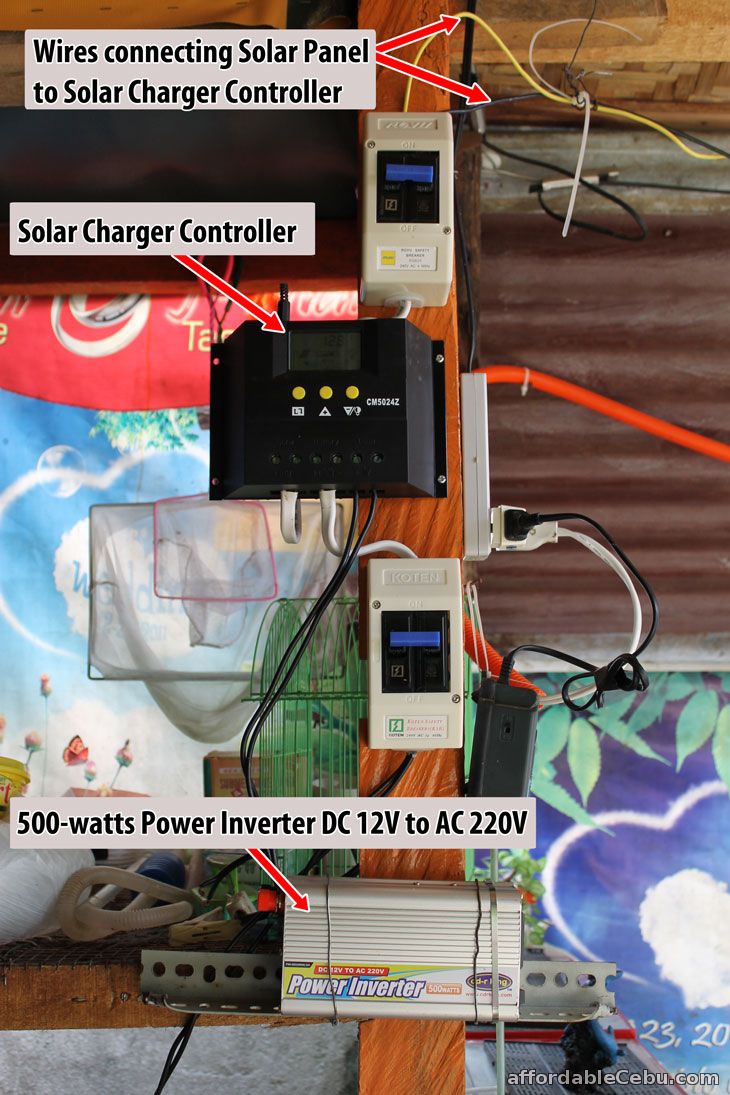
To use this solar-powered set-up, just plug any 220-volt AC electrical device or appliances (having 500-watts or below) to the Power Inverter. Make sure the device (load) should be within the range of 500-watts or below. Do not plug any device greater than the capacity of the power inverter or else the inverter will be oveloaded that can destroy the inverter.
What Appliances or Devices can be powered or plugged with this set-up?
With this set-up, you can power and plug any appliances or devices below 500 watts like:
- TV (Usually TV, LCD TV or LED TV ranges from 130 to 200 watts. You can see the input power capacity of the TV by looking at the back of the TV or LCD)
- computer (ranges from 140 to 300 watts)
- electric fan (40 to 60 watts)
- lights (1 to 50 watts or more)
- laptop (50 to 100 watts)
- charging cellphones, tablets (5 to 10 watts)
- phone/internet modem (10 to 15 watts)
- water pumps for aquariums and fish ponds (3 to 100 watts)
Some of you might ask some questions about my set-up. So I will compile your questions with answeres provided in the FAQ below. If you have any questions, don't hesitate to ask in the comment below.
Frequently Asked Questions (FAQ)
- Why did I use circuit breakers?
- I use circuit breakers to protect the Solar Panel and the Solar Charger Controller from current surge or from lightning strike.
- To close the circuit when we are not at home for many days.
- Does the Solar Panel produces current during cloudy or rainy days?
- Absolutely yes. Though it produces little current, it still charges my battery (within 1 amp to 0.1 amp) during cloudy and rainy days.
- Can I use flatcord stranded wire connecting from Solar Panel to Solar Charger Controller?
- Although you can use it but is not recommended due its light, soft and thin insulator. Heat from the sun may damage its insulator.
- Can I connect the Solar Panel to the Battery directly without Solar Charger Controller?
- To get the most out of your Battery and to prolong its lifespan, you must (it's recommended) use a Solar Charger Controller in order to avoid battery overcharging and overdischarging.
Do you have other questions, tips or recommendations with my solar power system set-up? Please post them in the comment below.